Stalybridge Junction Railway
Experiencing congestion at Guide Bridge, in 1877 the LNWR proposed a bypass line leaving the Heaton Norris to Guide Bridge line, passing through a tunnel at Hooley Hill, passing under the MS&LR main line (the "Woodhead" route) line east of Guide Bridge, and rejoining the MS&LR's Stalybridge branch just before Dukinfield Station and their bridge over the River Tame. Construction started in 1881 and the line opened in 1882.
In 1888 the LNWR proposed the creation of the Stalybridge Junction Railway which involved extending the line before its new junction with the MS&LR via a new line running to the south of, but almost parallel with the existing MS&LR line as far as Stalybridge. This allowed LNWR trains to avoid using the MS&LR line altogether. The extension opened in 1893.
The old link between the first part of the line and the MS&LR was removed in 1903.
No information yet of when the line was closed, however the viaduct in Dukinfield was demolished in 1972, although parts of an abutment are still visible at the junction of Charles Street and Wharf Street in Dukinfield.
There is an excellent detailed historic description of the lines around Stalybridge at http://www.buffetbar.freewebspace.com/shopping_page.html
There is an exploration of part of the line at http://www.bikerides.dsracing.me.uk/railway/hooleyhill.htm
Contents
1898 Map - Click on map above for full-size version (20 Mb)
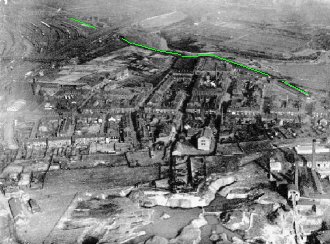
 View looking north-west; the LNWR line has just diverged from the MS&L line and passed under Stamford Road above the playing fields of Audenshaw High School |
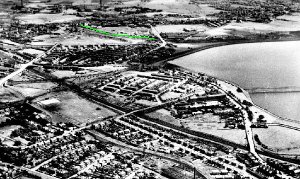
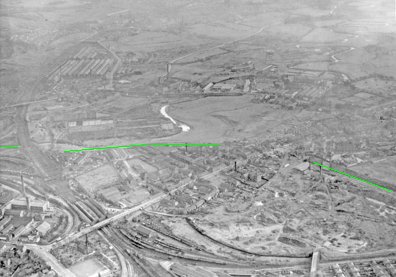
 Looking east, again you can see the route of the LNWR line |
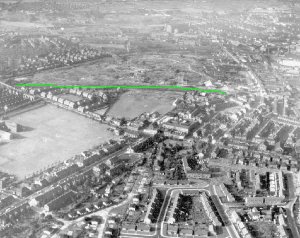 The green line shows the route of the LNWR line |
 |
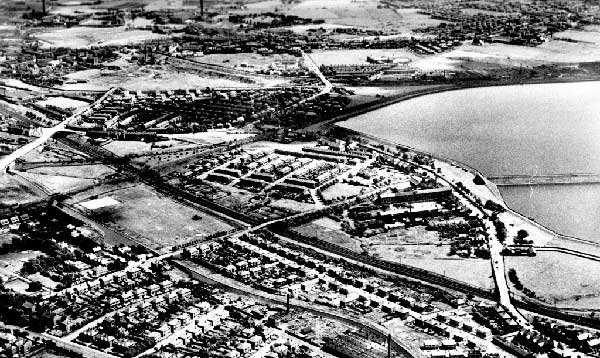
 Looking east with Hooley Hill in the centre. You can see the fan of the sidings north-east of Guide Bridge Station at the top left, and just about see where the LNWR line went under the MS&LR main line just to the left of the top centre of the picture. |
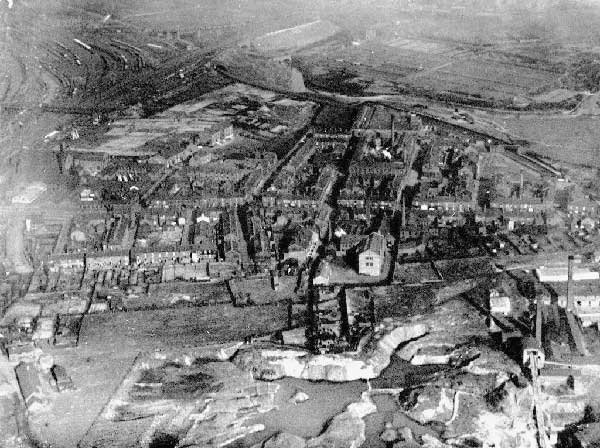
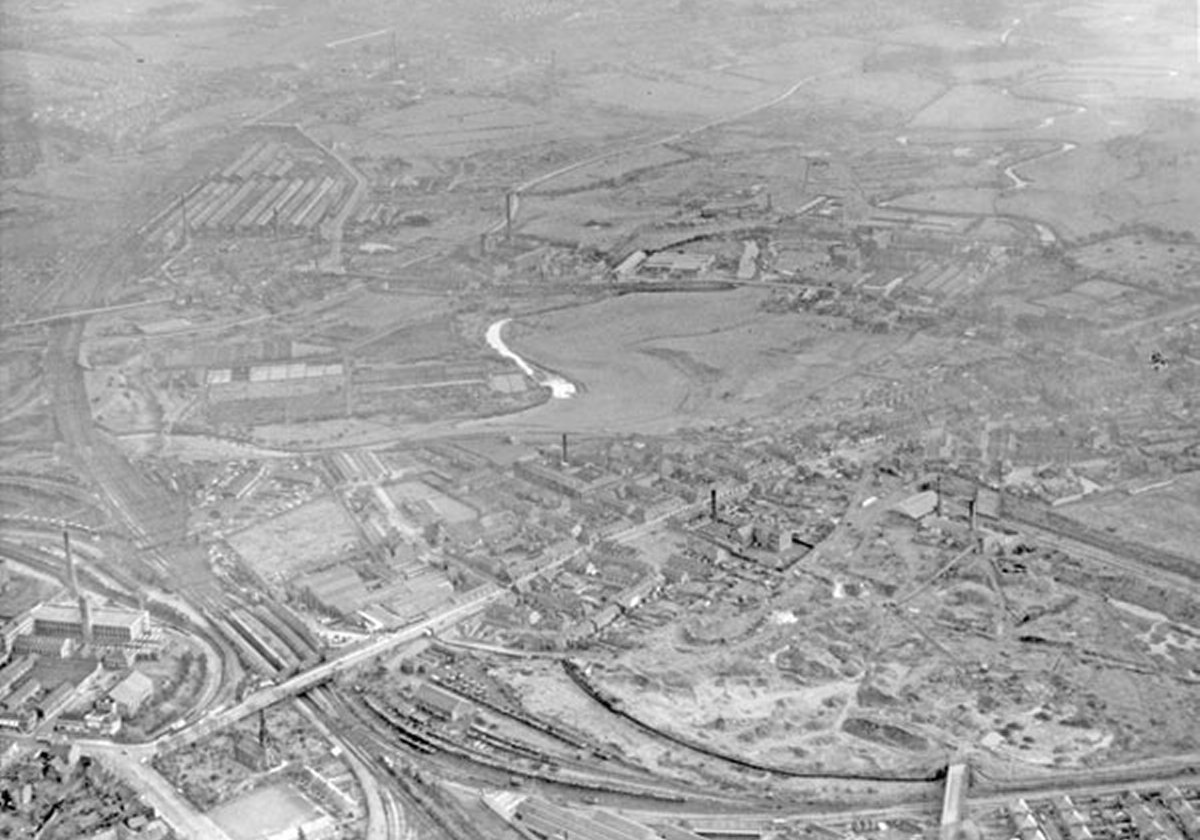 Similar shot, with Guide Bridge Station in the bottom left. You can just about follow the LNWR line and see the west portal of the Hooley Hill Tunnel |
 |
 |
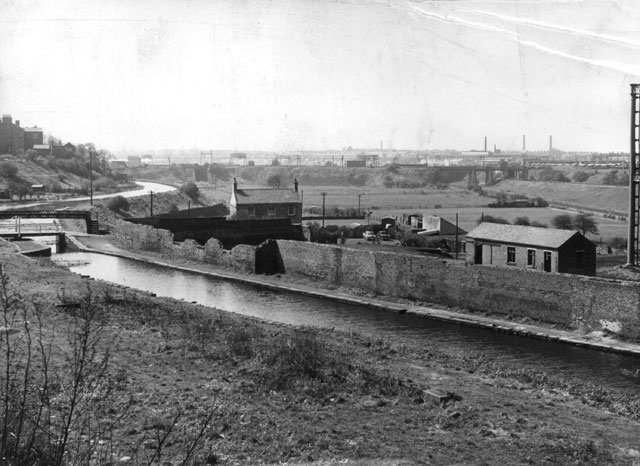
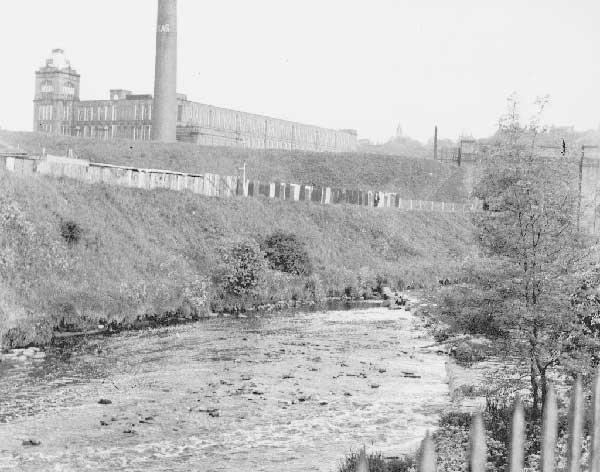
 Looking north-east towards Cavendish Mill in Ashton-under-Lyne. Charles Street is on the right. River Tame is in the centre and the Peak Forest canal is off to the right. You can see the catenary supports on the MS&LR Stalybridge Junction line, the LNWR line is on the embankment beyond the wooden fence to the left, climbing from when it went under the MS&LR main line, up to join the level of the MS&LR line just before where it crossed the River Tame. |
||
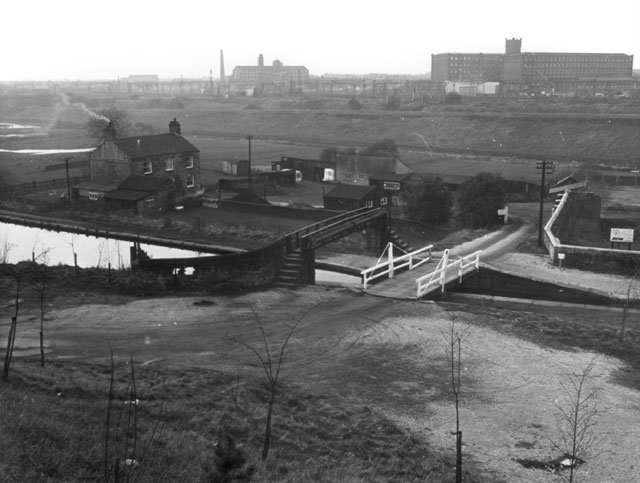
 Looking back south from above the canal. You can see catenary of the MS&LR "Woodhead" main line in the background, and towards the right the bridges which carried the east to north curve from the main line to the Stalybridge branch over the River Tame and the LNWR line, which rises on an embankment. |
 |
|
 |
 |
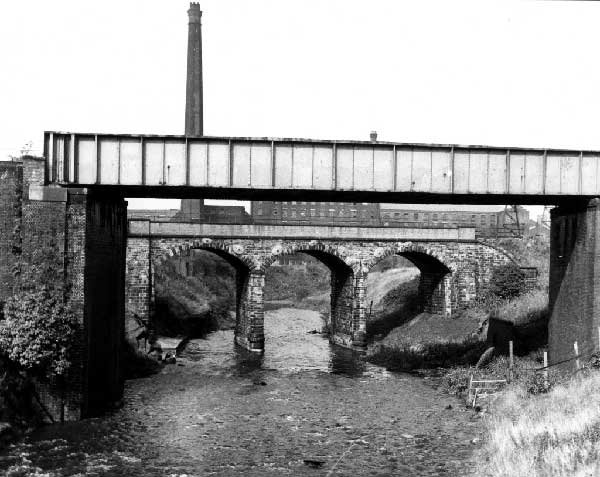 The first crossing of the River Tame, the LNWR bridge in the foreground with the earlier MS&LR bridge behind. |
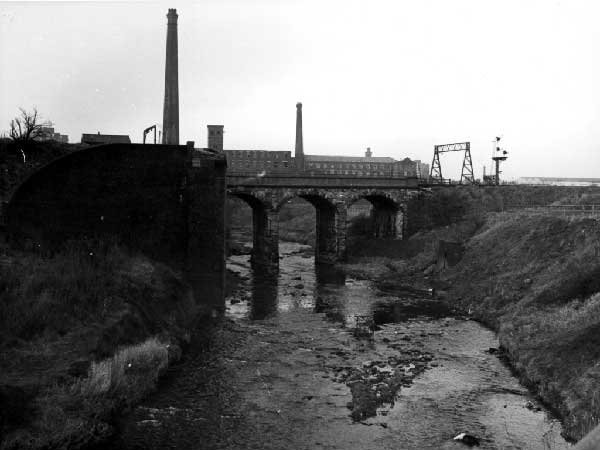 From a similar position, with the LNWR bridge long since demolished. |
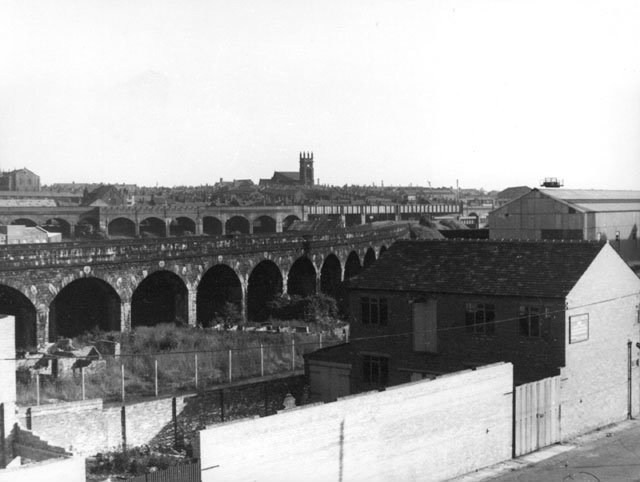 The two viaducts in Dukinfield, looking south from Ashton-under-Lyne - probably where the bypass is now. The viaduct in the foreground is the existing MS&LR line, with the viaduct for the "new" LNWR line behind it, since demolished. The church is St. Mark's in Dukinfield, which seems to have had some "turret work" done since. I suspect that the three "thicker" arches on the LNWR line are the location of Dukinfield & Ashton Station on Cooper Street. (Park Parade Station on the MS&LR line is out of shot to the left). |
 Looking north up King Street with Dukinfield Park in the centre with Dukinfield Town Hall just above. You can see the viaducts of the MS&L line clearly at the top, the LNWR line is just about visible below it. |
 |
|
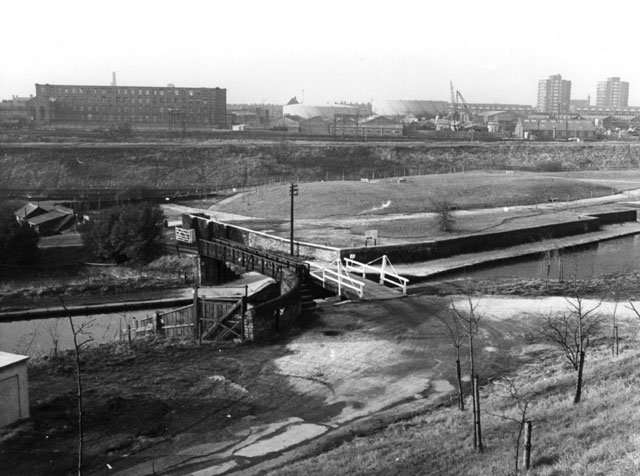
 Two more pictures looking in roughly the same direction. You can see the viaducts of the LNWR line and the second bridge (detail below) over the River Tame on the right. |
|
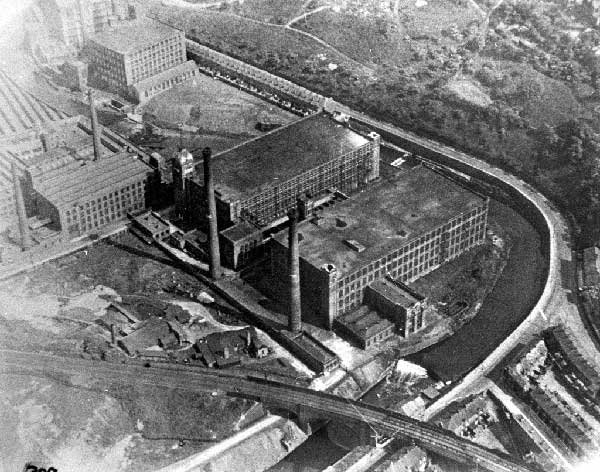
The line crossed the River Tame again just adjacent to Texas Mill
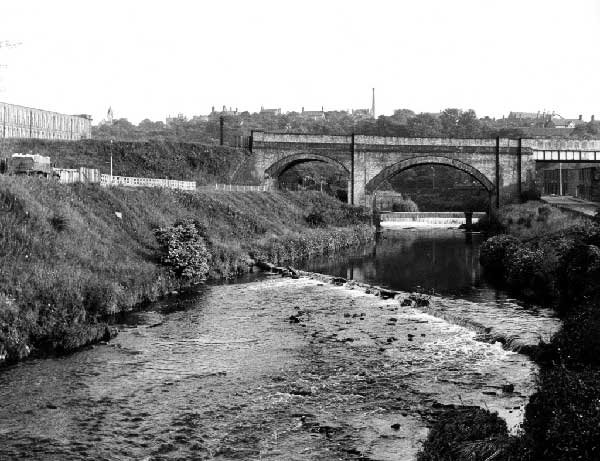 View looking south (upstream). Texas Mill is on the left. |
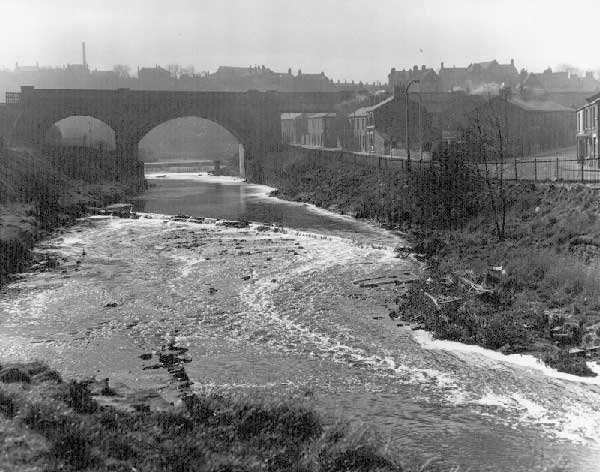
 View looking slightly further left; the LNWR bridge is now nearly out of shot on the right. |
 Looking south; the road under the metal bridge is Riverside. You can see Crescent Road off to the right. |
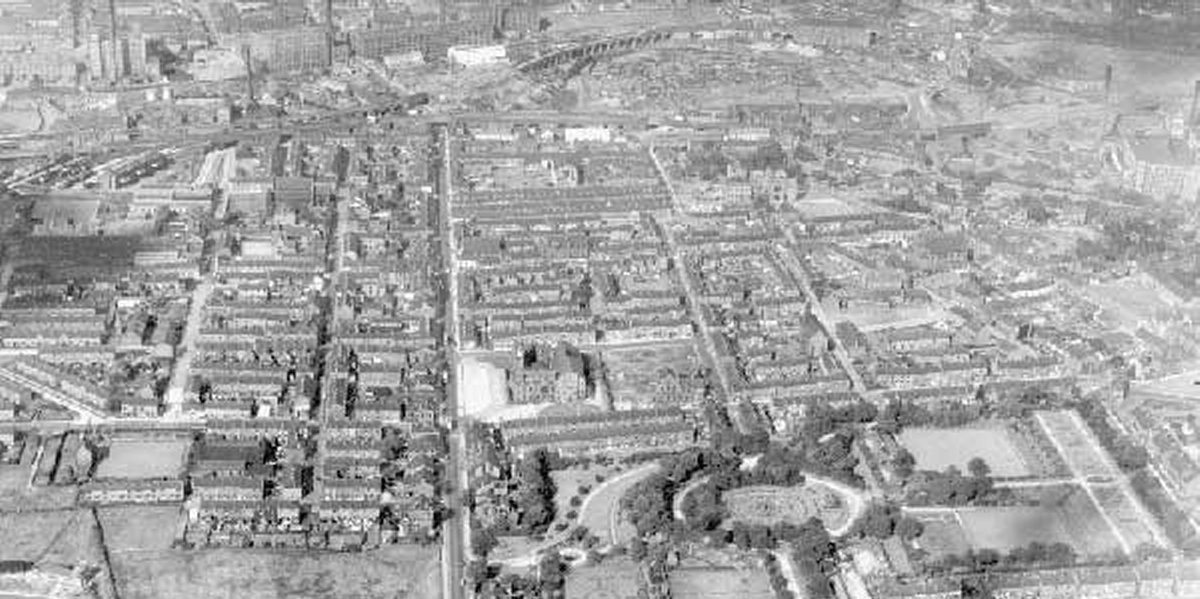
 Aerial view of the same area, looking south-east. Riverside goes under the railway, and then joins Park Road. |
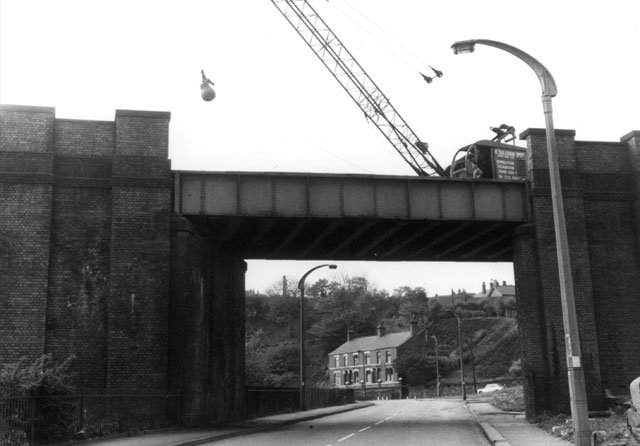 Demolition of the LNWR bridge over Whitelands Road |
 Looking up the canal towards the same area, the small bridge over the canal is probably Minerva Road |
The LNWR line rejoined the alignment of the MS&L line just after the Clarence Street bridges, west of Stalybridge Station.

From right to left, siding and line over Bayley Street, up and
down LNWR lines, up and down MS&LR lines, and on the embankment,
the Lancashire and Yorkshire Railway line to Ashton-under-Lyne (Charlestown)